文档备忘 ’ 目录归档

【备忘】修复打印机脱机,自动重启 打印服务

保存成 bat 文件,可以自动重启 打印服务,以解决打印机脱机等问题

@echo off
>nul 2>&1 "%SYSTEMROOT%\system32\cacls.exe" "%SYSTEMROOT%\system32\config\system"
if '%errorlevel%' NEQ '0' (
goto UACPrompt
) else ( goto gotAdmin )
:UACPrompt
echo Set UAC = CreateObject^("Shell.Application"^) > "%temp%\getadmin.vbs"
echo UAC.ShellExecute "%~s0", "", "", "runas", 1 >> "%temp%\getadmin.vbs"
"%temp%\getadmin.vbs"
exit /B
:gotAdmin
if exist "%temp%\getadmin.vbs" ( del "%temp%\getadmin.vbs" )

echo 检测 打印服务 状态
for /f "skip=3 tokens=4" %%i in ('sc query Spooler') do set "zt=%%i" &goto :next
:next
if /i "%zt%"=="RUNNING" (
    echo 关闭打印服务
    sc stop Spooler
) else (
    echo 该服务现在处理停止状态
    echo 启动打印服务    
    sc start Spooler
    exit
)
sc start Spooler
exit
  • 【备忘】修复打印机脱机,自动重启 打印服务已关闭评论

【黑苹果】 HD4000 2K显示器 花屏 Clover 注入EDID 解决,可正常显示2K分辨率

undefined
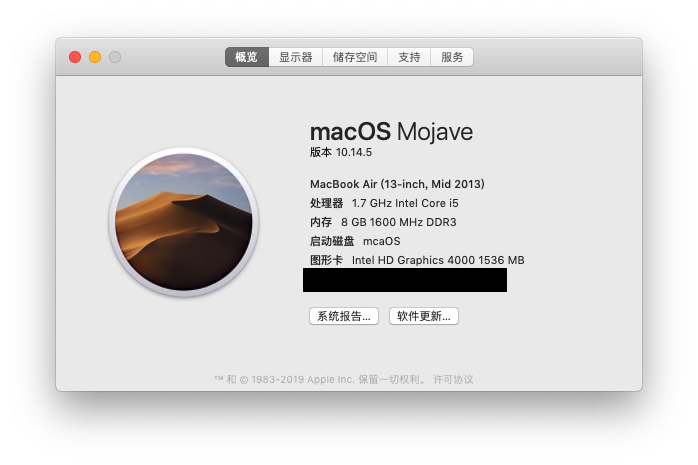
之前一台小机器装了黑苹果,显卡内置HD4000,只有HDMI接口,可以正常驱动。当时使用的是一台19寸普屏的液晶显示器,HDMI输出,正常进入系统,硬件驱动,分辨率正常。

undefined
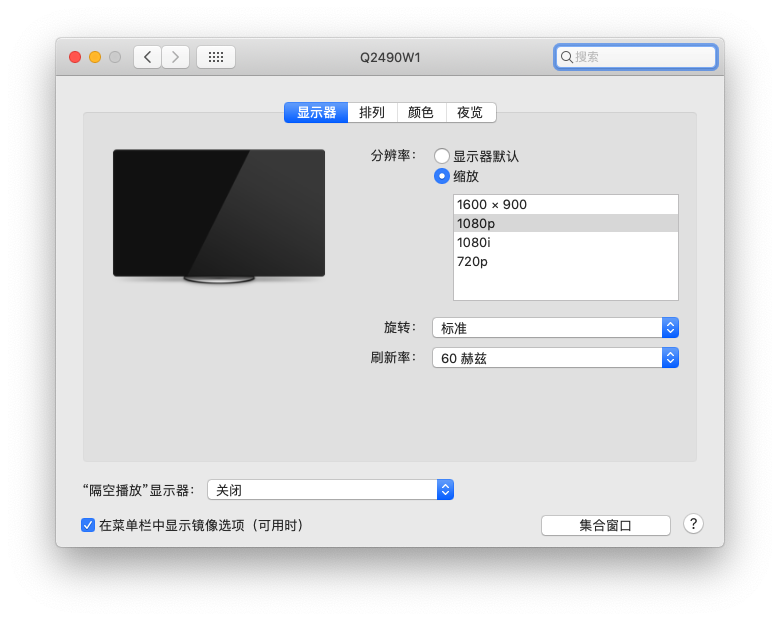
这几天换了台2K分辨率的23寸AOC显示器,启动正常,但是在LOGO界面就花屏,屏幕下方三分之一一片绿色,上面四个重叠在一起的画面。进入系统后,凭借模糊可辨的界面,进入显示器分辨率调节,设置为720后,屏幕不花屏了。但是只能显示原来整个屏幕图像三分之二,没有程序坞显示。看显示器分辨率,1080P,1080i,720,试了一下,只有720能正常显示。显示器识别信息错误,识别成了30寸。
undefined 阅读全文

  • 【黑苹果】 HD4000 2K显示器 花屏 Clover 注入EDID 解决,可正常显示2K分辨率已关闭评论

[ASUS] [梅林] 定时开关 WiFi

ASUS 路由官方固件,刷了 梅林merlin 固件,尽然没法子自定义开关WiFi…
只能自己动手操作了,每周 1-5 定时开关 访客网络2。
已开启 JFFS,并安装了 Entware

我这边访客网络为 wl0.2,大家可以看自己的路由器是多少。
我选择直接关闭WiFi网卡,好处是关闭、开启,不会丢失 mac 绑定控制,mac地址限制还在。
定时开启的语句如下,丢到启动脚本里面就可以。
cru a Start-Guest-WIFI “00 09 * * 1-5 /sbin/ifconfig wl0.2 up”
cru a Stop-Guest-WIFI “00 19 * * 1-5 /sbin/ifconfig wl0.2 down”

定时停止启动的命令参数含义如下:
cru a Stop-Guest-WIFI “00 19 * * 1-5 command”
基本格式 :
*  *  *  *  *  command
分  时   日  月  周  命令

第1列表示分钟1~59 每分钟用*或者 */1表示
第2列表示小时1~23(0表示0点)
第3列表示日期1~31
第4列表示月份1~12
第5列标识号星期0~6(0表示星期天)
第6列要运行的命令

  • [ASUS] [梅林] 定时开关 WiFi已关闭评论

[Android Studio] 工程中如何添加 [ksoap2]第三方包

编辑器从 eclipse 换到 android studio 后,导入之前的项目发现有些第三方包无法使用,按照网上的方法 add as library 无效,添加模块无效。
解决方法如下,添加以下内容:


//In Gradle
//Inside Build Types
repositories {
maven { url 'https://oss.sonatype.org/content/repositories/ksoap2-android-releases/' }
}

//and in dependencies
implementation 'com.google.code.ksoap2-android:ksoap2-android:3.6.2'

然后就可以 import 了

  • [Android Studio] 工程中如何添加 [ksoap2]第三方包已关闭评论

[Centos 7][Python] 安装pip

在虚拟机上安装了 centOs7 最小化方式安装后,登陆系统发现没有pip,现在给出简单方法安装如下:

yum -y install epel-release
yum install python-pip
  • [Centos 7][Python] 安装pip已关闭评论

[Python] 使用 PyRSS2Gen 写入 xml 文件中文乱码解决方法

#!/usr/bin/env python3
# -*- coding: utf-8 -*-

import os
import PyRSS2Gen

myrss.write_xml(open("test.xml", "w", encoding='utf-8'), encoding='utf-8')
# write_xml 方法在写入时 设置的 [encoding='utf-8']参数,只能在文件内容上标明使用 utf-8,但文件保存时的实际编码和这个无关
# 需要在 open 方法这边设置 [encoding='utf-8'],这样就会将文件以 utf-8 编码保存,中文不会乱码。
  • [Python] 使用 PyRSS2Gen 写入 xml 文件中文乱码解决方法已关闭评论

[Python] 读取csv 文件 设置 dtype 防止数据类型导入错误

#!/usr/bin/env python3
# -*- coding: utf-8 -*-

import os
import pandas as pd  

def getFundCodesFromCsv(self):  
    # 从csv文件中获取基金代码清单(可从wind或者其他财经网站导出)
    file_path = os.path.join(os.getcwd(),'fund.csv')  
    fund_code = pd.read_csv(filepath_or_buffer=file_path, encoding='utf-8', dtype='str') 
    # dtype 需要设置,否则基金代码前面是 0 的会以 int 导入,而导致 0 被去掉,代码错误。
    # 比如 001234 --> 1234 
    Code = fund_code["Code"]
    #print ( Code)  
    return Code  
  • [Python] 读取csv 文件 设置 dtype 防止数据类型导入错误已关闭评论

[Python] Centos7 安装 Python3

CentOS 7 默认安装了 Python 2,当需要使用 Python 3 的时候,可以手动下载 Python 源码后编译安装。

  1. 安装 Python 3
    1.1 安装准备
$ sudo mkdir /usr/local/python3 # 创建安装目录
# 下载 Python 源文件
$ wget https://www.python.org/ftp/python/3.6.4/Python-3.6.4.tgz
$ tar -xzvf Python-3.6.4.tgz # 解压缩包
$ cd Python-3.6.4 # 进入解压目录

1.2 编译安装

$ sudo ./configure --prefix=/usr/local/python3 # 指定创建的目录
$ sudo make
$ sudo make install

1.3 配置
1.3.1 两个版本共存
创建 python3 的软链接:

$ sudo ln -s /usr/local/python3/bin/python3 /usr/bin/python3

这样就可以通过 python 命令使用 Python 2,python3 来使用 Python 3。

1.3.2 修改默认为 Python 3
将 /usr/bin 中的 python 备份

$ sudo mv python python.bak

然后创建 python3 的软链接

$ sudo ln -s /usr/local/python3/bin/python3 /usr/bin/python

这样默认的 Python 版本就替换为 Python 3 了。
因为 yum 使用 Python 2,因此替换为 Python 3 后可能无法正常工作,因此修改 yum 配置文件

$ sudo vi /usr/bin/yum

将第一行指定的 python 版本改为 python2.7(#!/usr/bin/python 改为 #!/usr/bin/python2.7)

  1. 安装 pip
    Python3.6 自带,只需要创建软链接就可以。安装软件用 pip3 install 就可以安装到适合 python3 的
$ sudo ln -s /usr/local/python3/bin/pip3 /usr/bin/pip3
  • [Python] Centos7 安装 Python3已关闭评论

[Openwrt] CentOS7 Openwrt 编译环境搭建

方便起见,我直接安装了虚拟机使用,安装版本:CentOS-7-x86_64-Minimal-1611
一切安装就绪后,先更新系统,然后建议以非 root 用户启动进行编译。

yum update
yum install git -y
yum install perl -y

1、下载源码,可使用如下命令下载最新版本。由于这样下载缓慢,我直接从网页下载了zip包,解压后直接 winSCP 上传到虚拟主机上,速度快很多。

git clone https://github.com/openwrt/openwrt.git
svn checkout https://github.com/openwrt/openwrt.git

2、下载feeds

//在openwrt目录中执行
./scripts/feeds update -a
./scripts/feeds install -a

3、make defconfig,检查依赖项,报错,以及解决方法如下: 阅读全文

  • [Openwrt] CentOS7 Openwrt 编译环境搭建已关闭评论

[Android] 消除 Wi-Fi 和移动网络上感叹号或者X号的方法

Android 7之前的方法:

adb shell "settings put global captive_portal_server g.cn"

Android 7 的方法

adb shell "settings put global captive_portal_server www.google.cn"

Android 7.1.1 的方法

adb shell "settings put global captive_portal_https_url https://www.google.cn/generate_204"

备选方案:完全关闭网络检查服务,依次输入下面语句

adb shell settings delete global captive_portal_http_url
adb shell settings put global captive_portal_detection_enabled 0

如果您想恢复的话,使用下面的语句:

adb shell settings put global captive_portal_detection_enabled 1

读取相关设置

adb shell "settings get global captive_portal_https_url";

以上方法来源于网络

  • [Android] 消除 Wi-Fi 和移动网络上感叹号或者X号的方法已关闭评论

return top